I love the 'Fall Tree" Nail
What you'll need:
Base color (try a soft metallic like the top pic, or a bright shade to make the tree 'pop')
A black or brown nail art pen or slim brush polish
TRY
Sally Hansen Nail Art Pen $8
Strip Right Nail Polish, Sally Beauty Supply, $4
You can use a dotting tool
to add the 'leaves' on the tree if you want to (like the top pic)
(cool tip: dotting tools are available on Amazon.com for less then $3)
Ombre Nails with a Metallic Grommet
I find this to be more mature and professional - so its great for work! Pick your range of shades, really anything can work if you plan it out right
My favorite being jewel tones
Next you need the grommets and this fool-proof sealant
Grommets
You'll need to order them and be patient while they ship BUT the good news? They are about a $1 for a bunch!
Seriously! $1
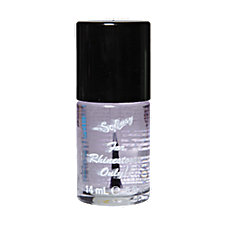
Next, on that trip to Sally Beauty Supply, pick up "For Rhinestones Only" for $4.50

This top coat lets you stick the grommets on and seal them in! Works on all sorts of nail applications!
You can use a dotting tool, pencil or toothpick to pick up the metal and place it on the wet nail coated with top coat, check this out:
Try a funny Halloween Inspired Nail!
All you need a base color and a nail art pen!
Try to get one with the finest tip possible
and my new favorite, the pumpkin!
1. Paint nails with base color, let dry 10 minutes
2. Swipe a circular shape (doesn't need to be perfect) of bright orange on the tips for the base of the pumpkin, let dry 10 minutes
3. take toothpick, fine brush, dotting tool or nail art pen and stripe on a lighter shade of orange 3-5 times to add depth to the pumpkin
4. dab on the stem (can use black or brown)
5. use a toothpick to swirl on the vine - if you don't have green, just use the brown!
I love Fall nail art! Its so fun! What are YOU going to try?


No comments:
Post a Comment